Editing BobaDocs
This guide will show you how to edit BobaDocs, the website that you're looking at right now.
You will need:
- A GitHub account. (A brief explanation of GitHub is available in our Knowledge Base. Any
git terminologyuse in this guide is also explained there.)
You will NOT need:
- Any knowledge of command lines.
Step 0: Create your own copy of BobaDocs
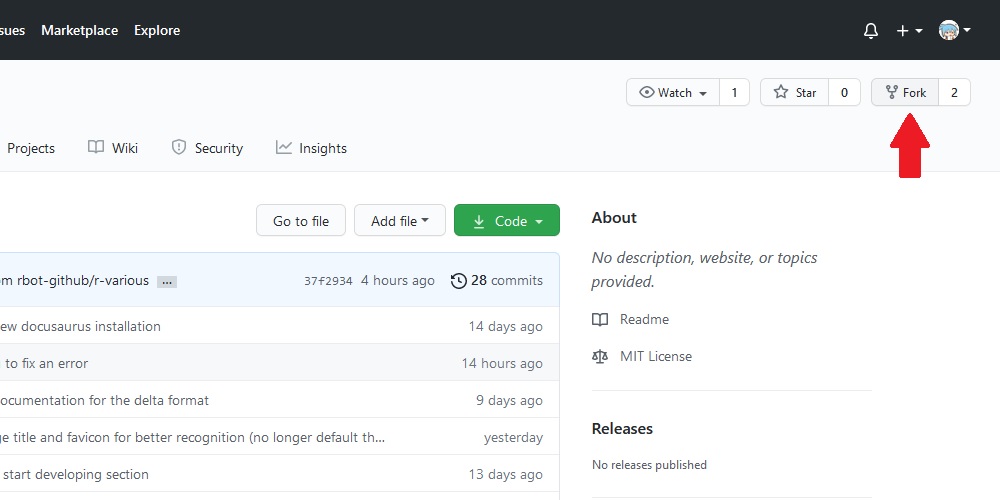
Only the BobaLord is allowed to modify the original copy of BobaDocs. To make changes, you'll have to your own copy of the files. This process is called forking, and you can read more about it in our knowledge base.
If you already have a copy of BobaDocs, skip to Keeping your files updated.
Here are the steps to do this:
- Make sure you're logged in to GitHub.
- Navigate to the main repo for the site at https://github.com/essential-randomness/bobadocs. (You can also get there by clicking the "GitHub" link on the top right corner of the BobaDocs site!)
- Click the "Fork" button on the top right corner of the page.
- You will be automatically redirected to your copy of the files. You can double-check that you're on your copy by checking the name of the git repo on the top left of the page. It should say
[USERNAME]/bobadocswithforked from essential-randomness/bobadocsin smaller text under it.
By the way! To do this right, you'd also need to branch. Read our knowledge base to learn more about branching.
Keeping your files updated
As more and more people edit BobaDocs, the main repo will be updated, including changes that your repo doesn't have. Not to worry! GitHub will prompt you when this occurs. All you need to to is click the "Fetch upstream" dropdown on your main repo page, click "Fetch and merge", and GitHub will do the rest.
Step 1: Open the page in GitHub's editor
Now that you have your own copy of the files, all you have to do to edit the pages in BobaDocs is edit those files. GitHub has a built-in editor that makes this easy to do. Here's how you get to it:
- Start by opening the page you want to edit in your browser.
- Scoll down and click the green "Edit this page" link at the bottom of the page. An editor will open. Do not use this editor.
- Edit the URL of the editor page by replacing
essential-randomnesswith your GitHub username. Going to the edited URL will open the same editor, but using your copy of the files. Use this editor. Like before, you can tell you're in the right place if[USERNAME]/bobadocsappears on the top left.
Remember how the last tip mentioned branching? That last bullet is there to keep you from accidentally creating a branch (something outside the scope of this guide). If you do create a new branch and need to delete it, see the appendix for how to do that.
Step 2: Make your edits
To edit pages in BobaDocs, you need to use Markdown. Markdown is a widely used system for formatting text. If you've typed asterisks into Discord to italicize something, you've used markdown.
Here is a cheat sheet guide to markdown syntax. That site also includes more detailed information about the system. Please keep it, or any other guide, handy as a reference while you work.
We will now focus on things specific to GitHub's editor.
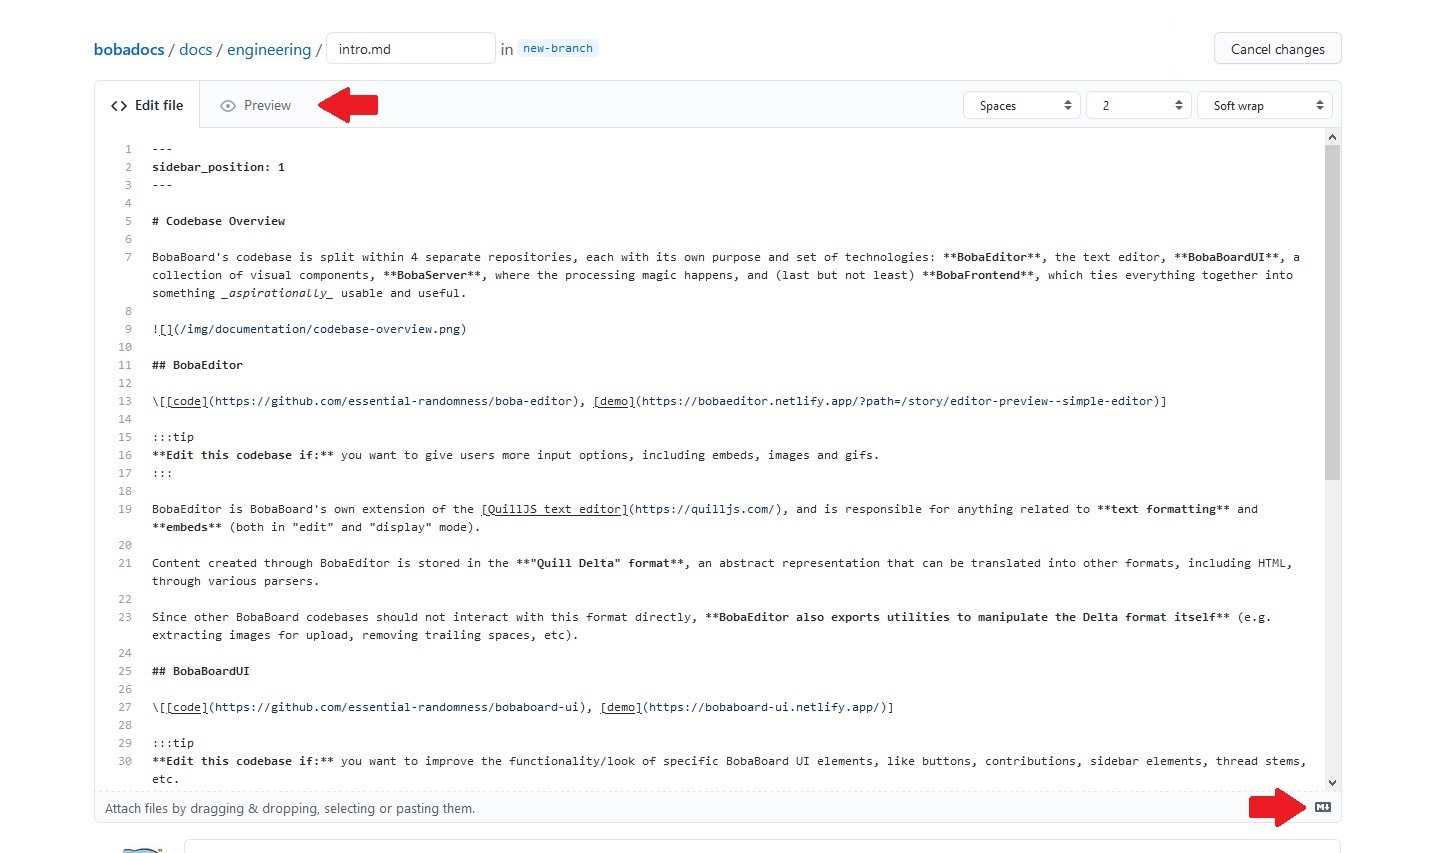
On the bottom right of the editor is a button with an M next to an arrow pointing down. This is short for "markdown", and clicking the button will direct you to GitHub's Markdown Guide, another good reference.
On the top left of the editor is a "Preview" tab, which will let you look at your work before saving it.
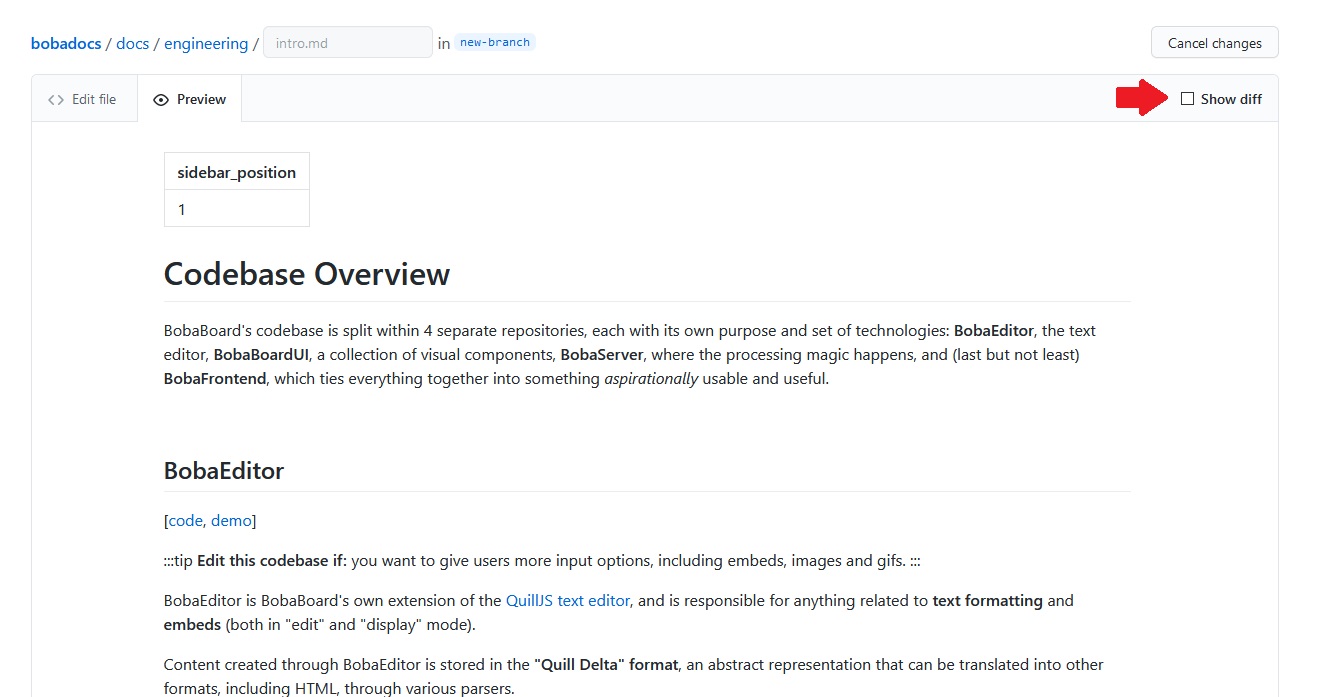
Use this tab often. Clicking the "Show diff" button on the top right of preview will highlight the changes you've made to the file, making it easy to see what you've done so far. Use show diff often.
Notice how GitHub's preview doesn't look exactly the same as the page on Docusaurus? That's because Docusaurus makes use of tools that GitHub's editor doesn't, such as HTML or page metadata at the top of the file. If you're going to use these in GitHub's editor, take extra care and leave plenty of space between different elements to avoid errors.
Once you're satisfied with your changes, it's time to save them. Scroll down the page.
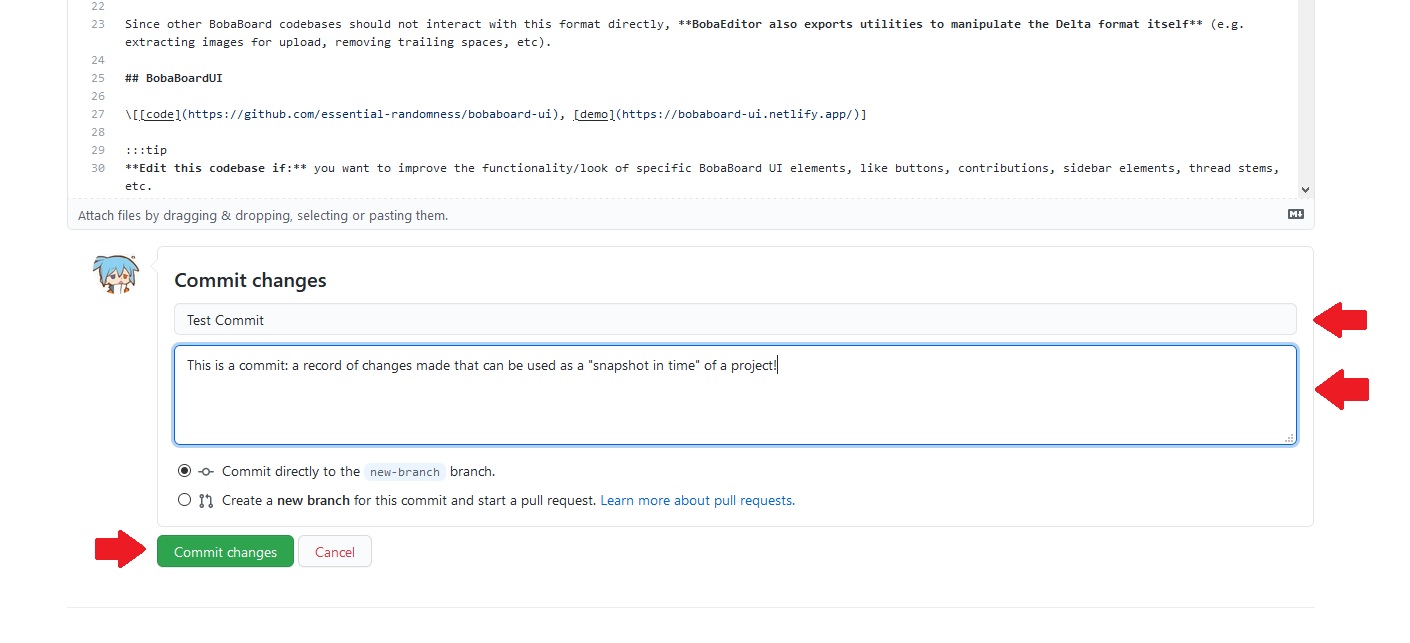
Title your changes, and write a description for them. Once you're satisfied with that, click the "Commit" button to save the changes. After saving your changes, click back to the main page of your repo.
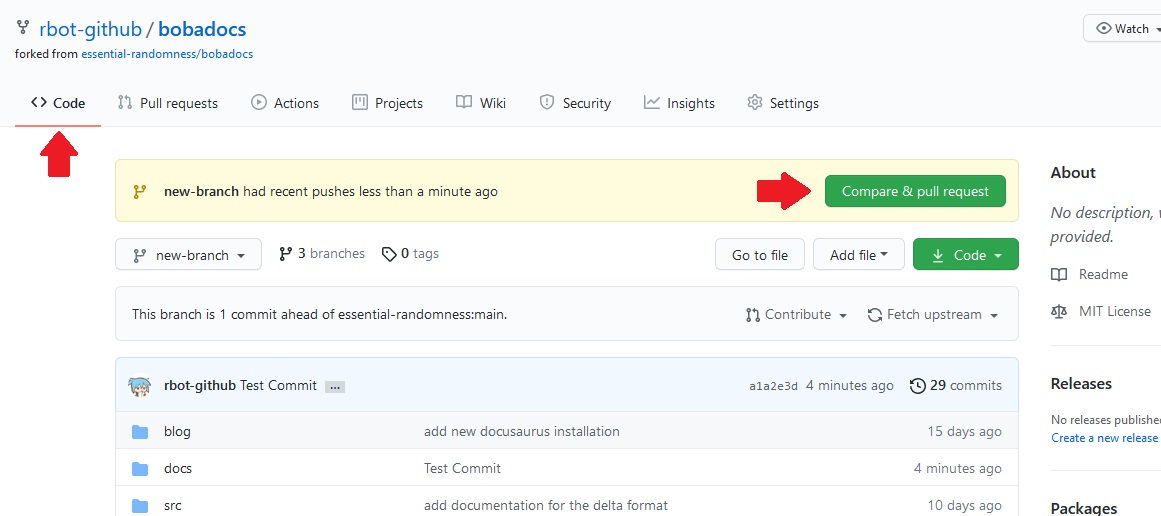
You'll notice that GitHub has noticed that you made changes. If you want to edit more than one page, repeat Steps 1 & 2 for each page you want to edit. Once you've made all the changes you want to make to all the pagess you want to make them to, it's time to submit those changes to the BobaLord for review.
Step 3: Submit your changes
GitHub lets users submit changes to the main repo through a pull request. Clicking the "Compare & pull request" button on your repo will send you to the page where you do this.
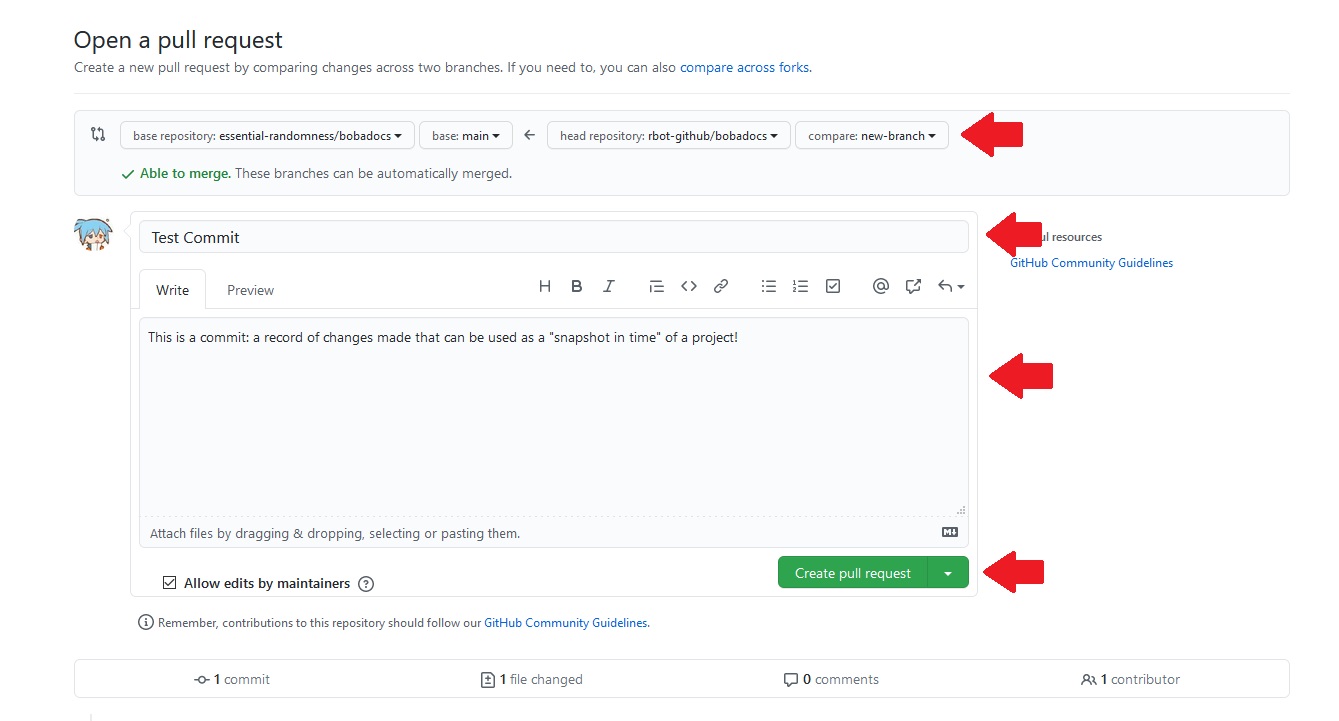
Here's how you submit:
At the top of the form are some dropdowns for selecting which copies of the files to use. They should be filled in automatically.
Title your submission.
Describe the your changes in the larger textbox. We recommend at minimum a summary of what you did at the top, followed by a more detailed list. In your description, please mention that you used this method (editing directly in GitHub, meaning that you did not use yarn to test run the site) before submitting. This will let us know to double check that everything works properly before accepting.
Hit submit! Your changes are now sent!